Google Analytics and Meta Pixel implementation in Zencal
Zencal and Meta Pixel Integration
Meta Pixel (formerly Facebook Pixel) allows you to track user behavior and conversions from your Zencal booking page. Here's how to set it up properly.
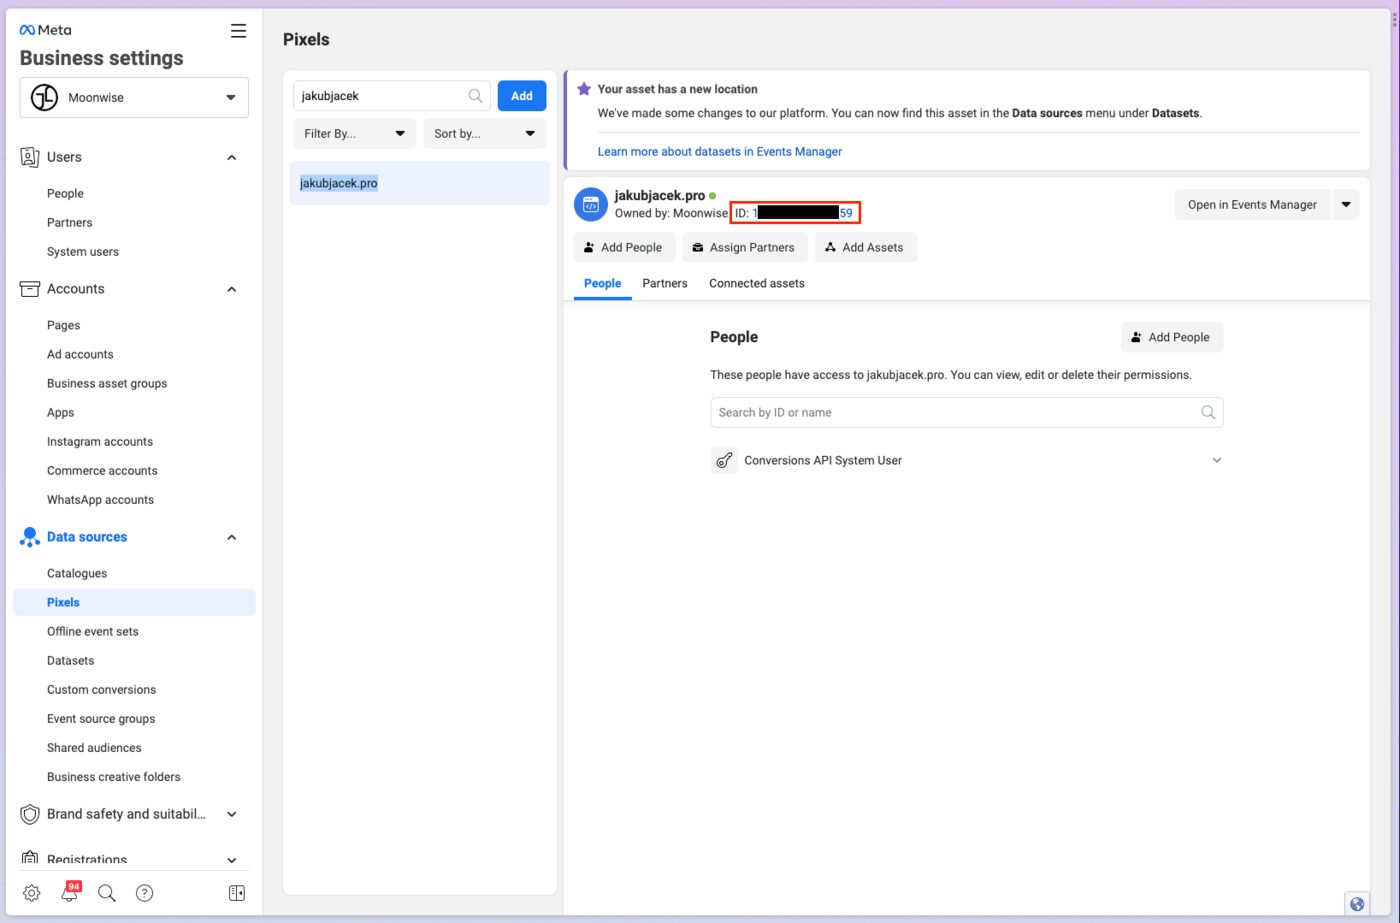
Finding Your Meta Pixel ID
First, you need to locate your Pixel ID in Meta Business Manager:
- Go to Meta Business Manager
- Navigate to Data Sources → Pixels
- Select your Pixel from the list
- Copy the Pixel ID displayed on the main screen
Configuring Meta Pixel in Zencal
Now let's add your Pixel ID to Zencal:
- Go to your profile edit page at app.zencal.io/profile-page/form
- Scroll down to find the "Connect your analytics" section
- Paste your Meta Pixel ID in the Facebook-labeled field
- Click the Save button

Testing Meta Pixel Implementation
After configuration, it's crucial to verify that your Pixel is working correctly. There are two methods to test this.
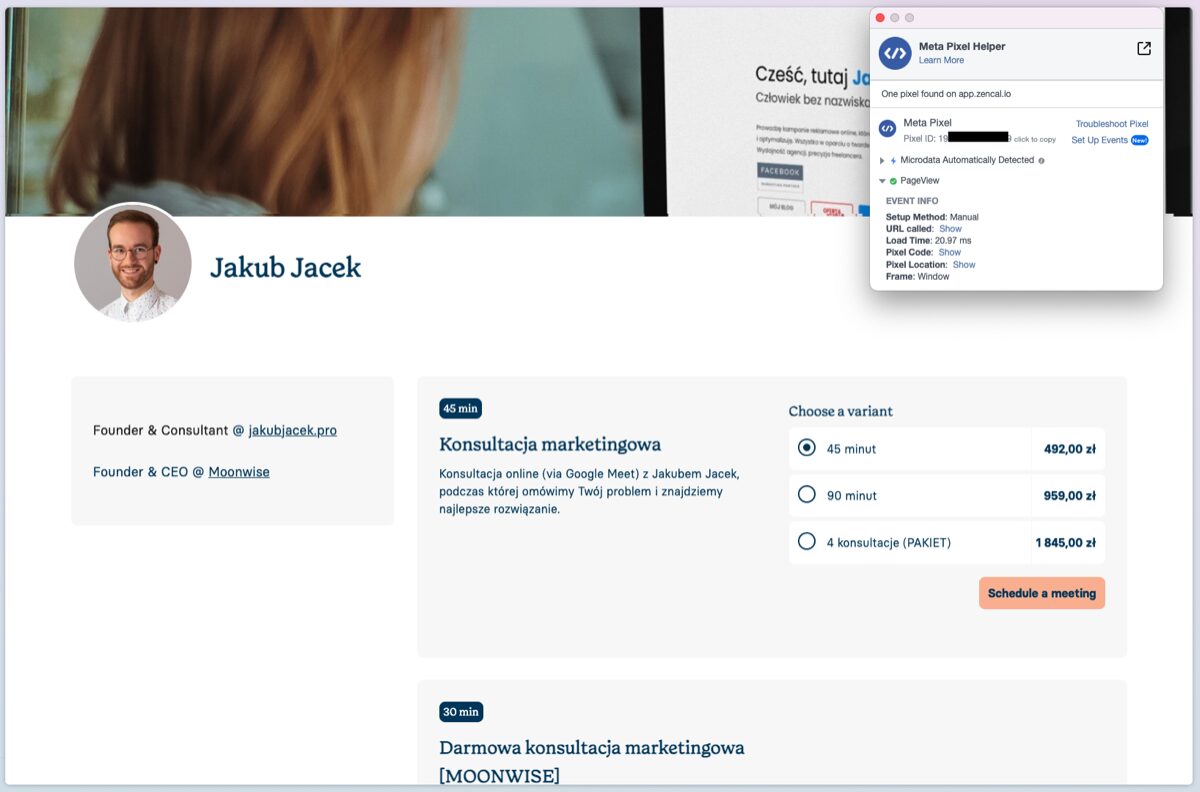
Method 1: Meta Pixel Helper Browser Extension
The Meta Pixel Helper is a Chrome extension that helps you validate your Pixel implementation:
- Install the Meta Pixel Helper extension
- Navigate to your Zencal profile page
- Click the extension icon in your browser
- Verify that your Pixel ID is displayed correctly
- Check for the "PageView" event with a green checkmark
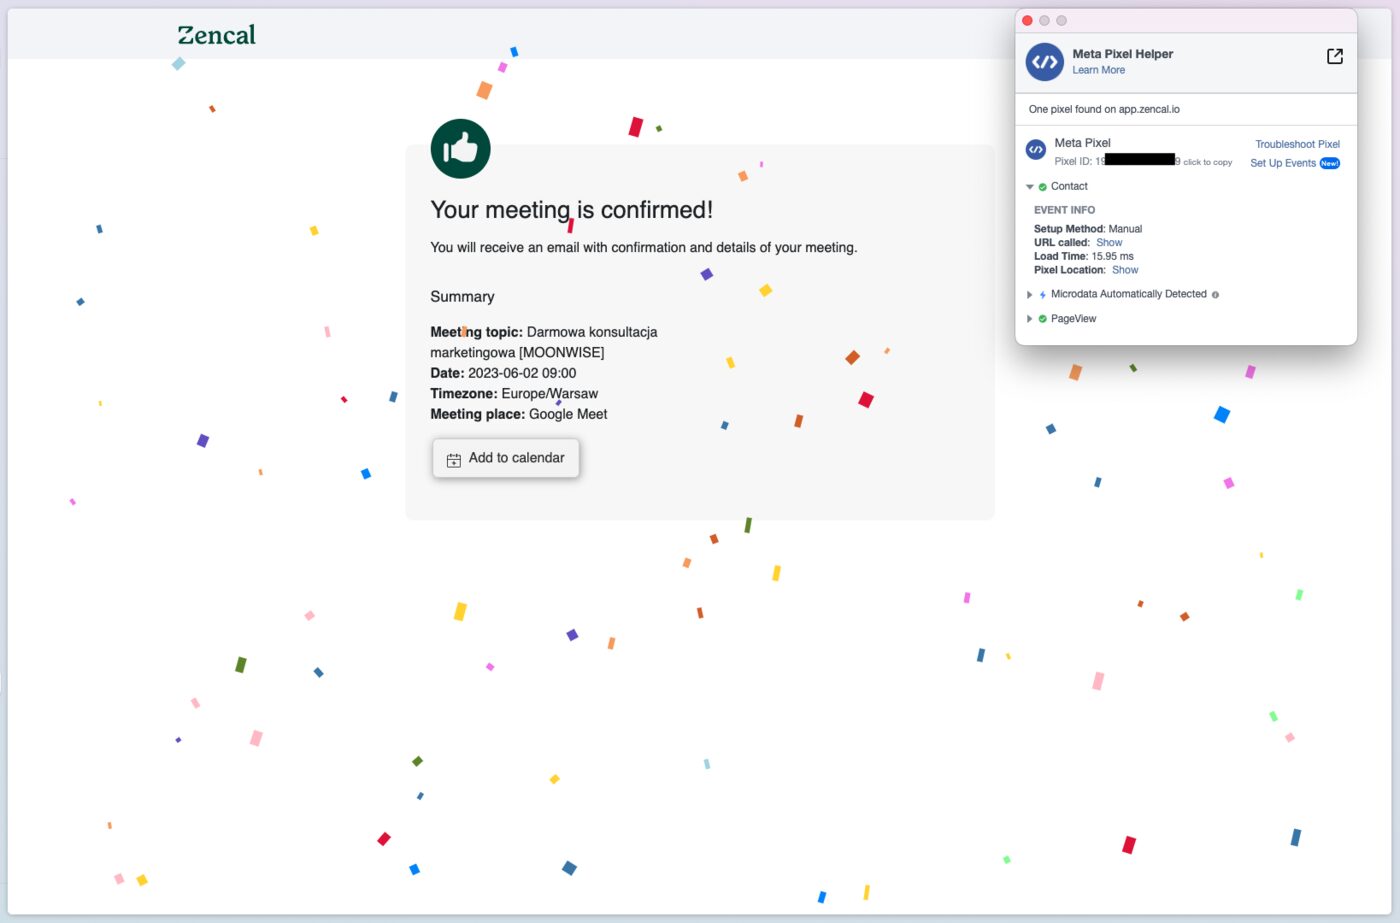
When a visitor confirms an appointment, you should also see the "Contact" event fire:
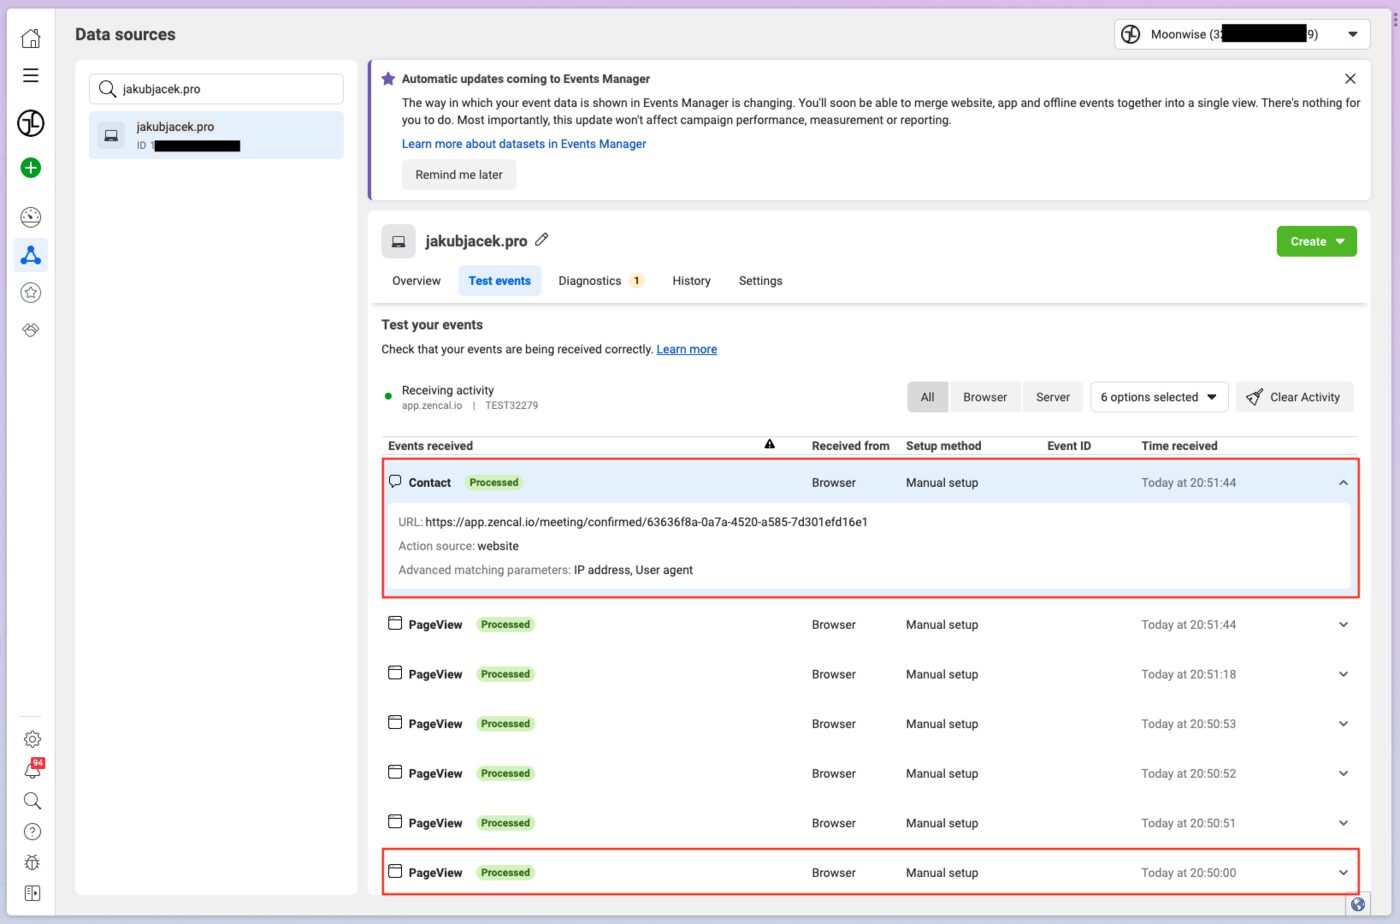
Method 2: Test Events Tool in Meta Events Manager
For more detailed testing, use Meta's built-in test events tool:
- Go to Meta Events Manager
- Navigate to the Browser Events Testing section
- Enter your Zencal profile URL
- Schedule a test appointment
- Verify that "PageView" and "Contact" events appear in the test results
Additional Settings
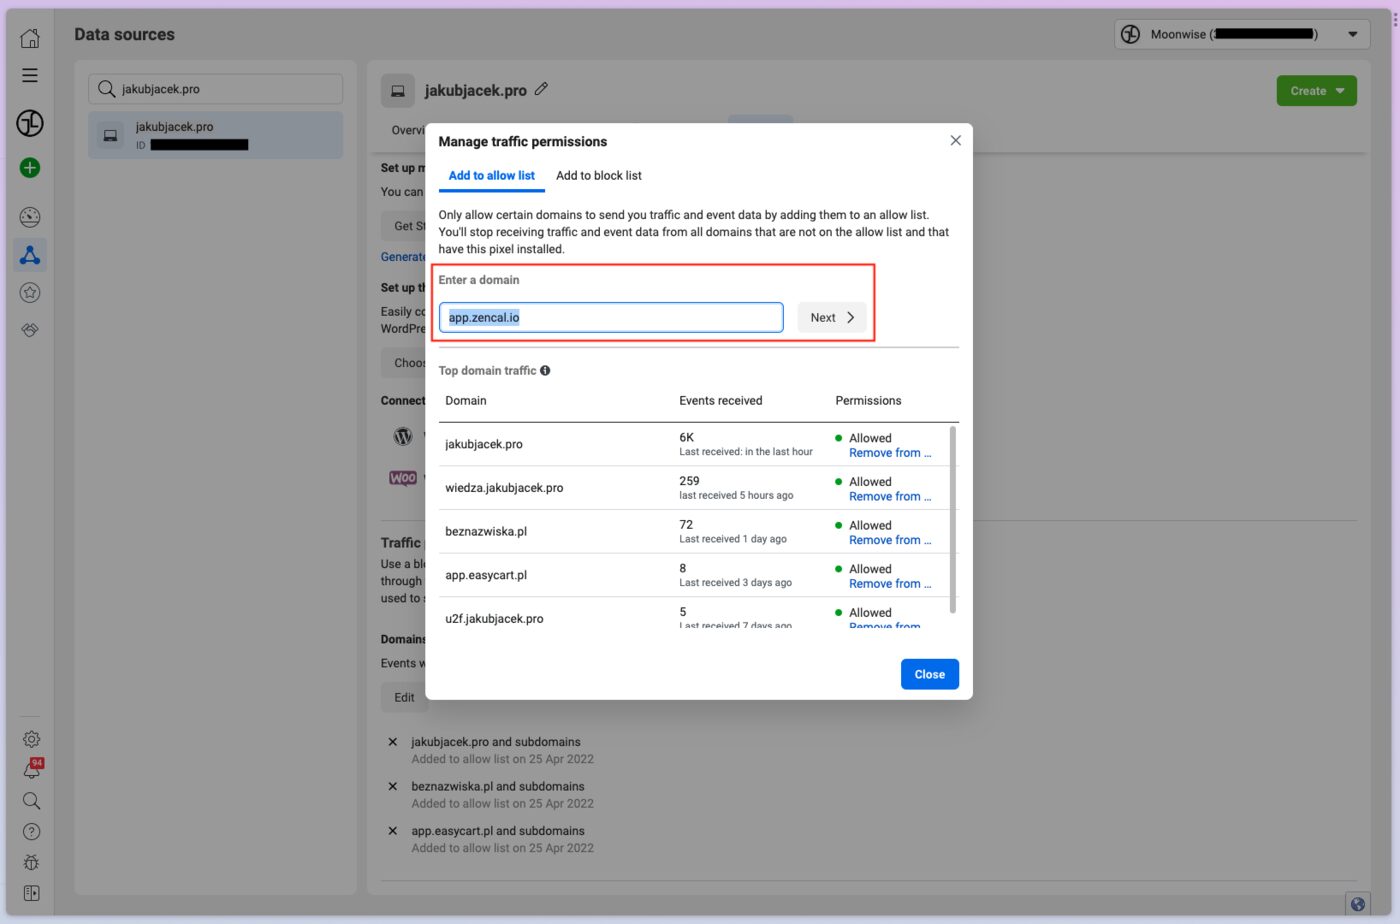
Make sure that the domains app.zencal.io and zencal.io are not excluded in your Meta Pixel traffic permissions. This ensures that all events from your Zencal page are properly tracked.
Start your 14-day free trial and automate your scheduling today.
Zencal and Google Analytics 4 Integration
Google Analytics 4 (GA4) provides comprehensive insights into user behavior on your Zencal booking page. Here's how to set it up.
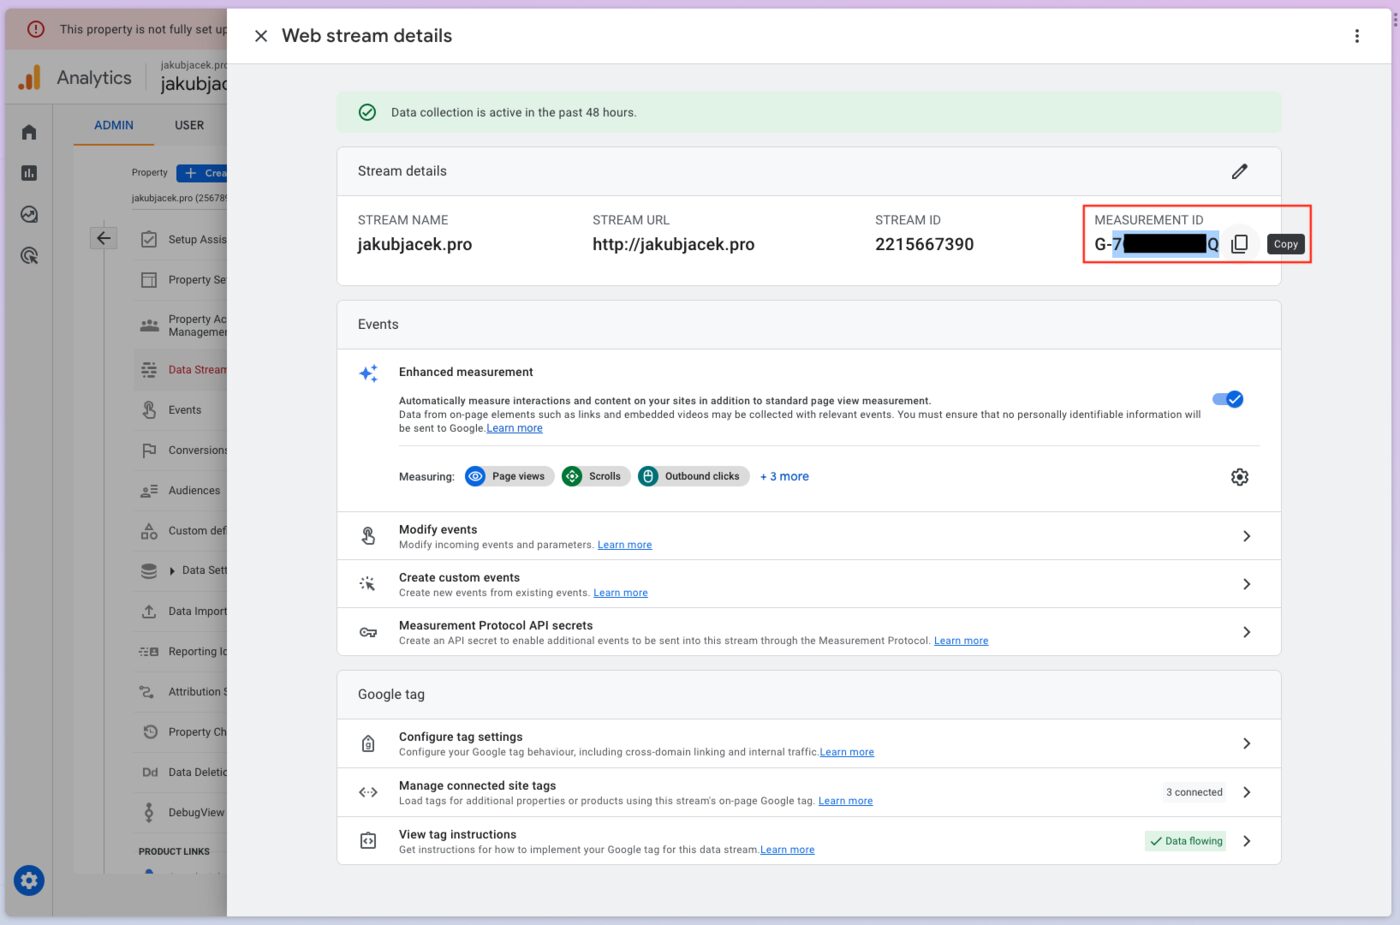
Finding Your Measurement ID
First, locate your GA4 Measurement ID:
- Log into your Google Analytics 4 account
- Click on Admin (gear icon)
- Navigate to Data Streams
- Select your web data stream
- Copy the Measurement ID (it starts with "G-")
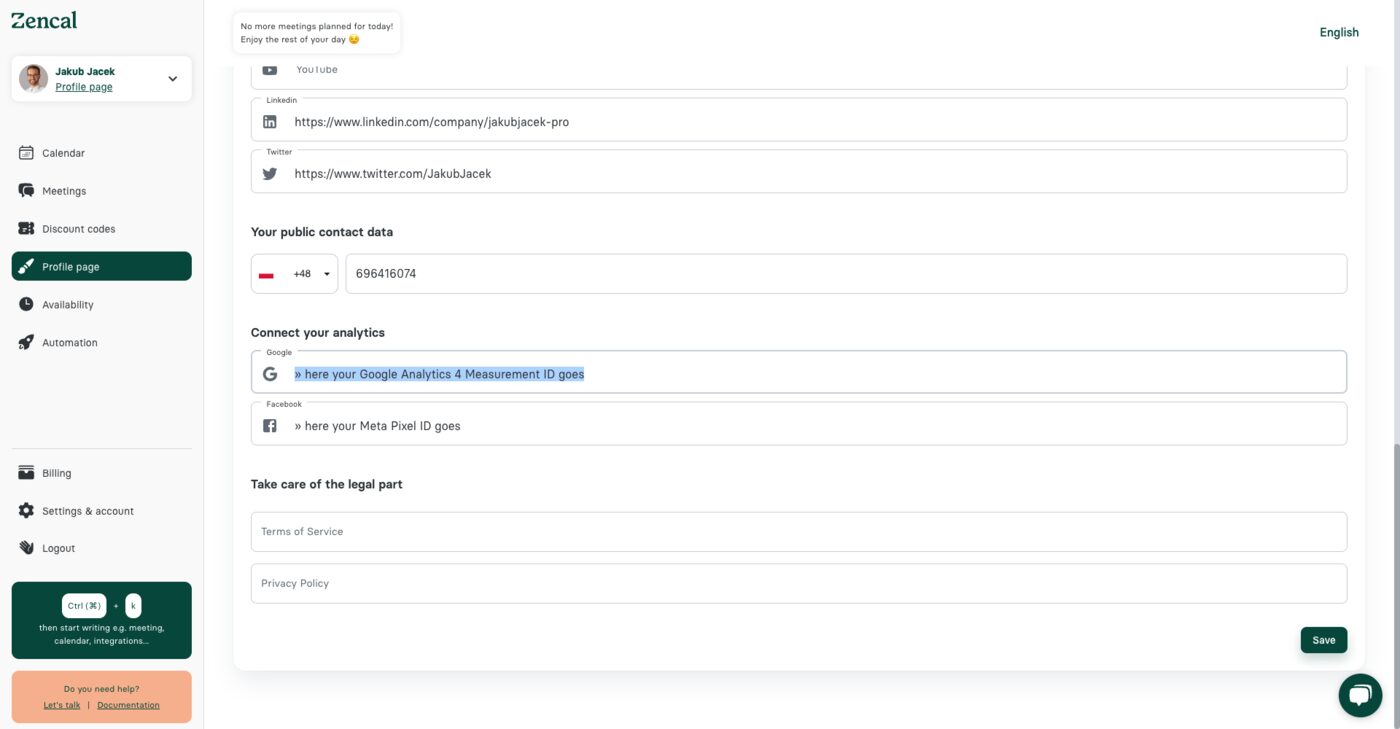
Configuring Google Analytics in Zencal
Now add your Measurement ID to Zencal:
- Go to app.zencal.io/profile-page/form
- Scroll to the "Connect your analytics" section
- Paste your Measurement ID without the "G-" prefix in the Google Analytics field
- Click Save
Testing Google Analytics Implementation
Verify that your GA4 implementation is working correctly using these methods.
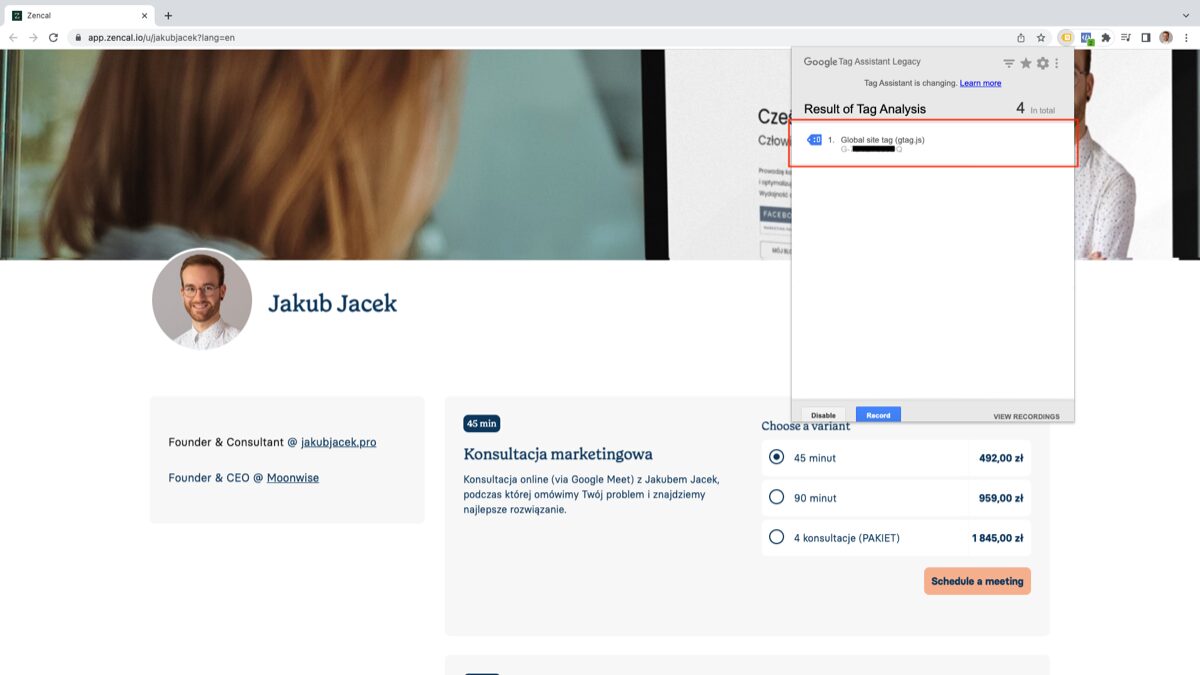
Method 1: Google Tag Assistant Legacy
Install the Google Tag Assistant to verify your setup:
- Install the Google Tag Assistant Legacy extension
- Enable the extension and refresh your Zencal profile page
- Look for a blue Global site tag (gtag.js) indicator
- Verify that the Measurement ID matches yours
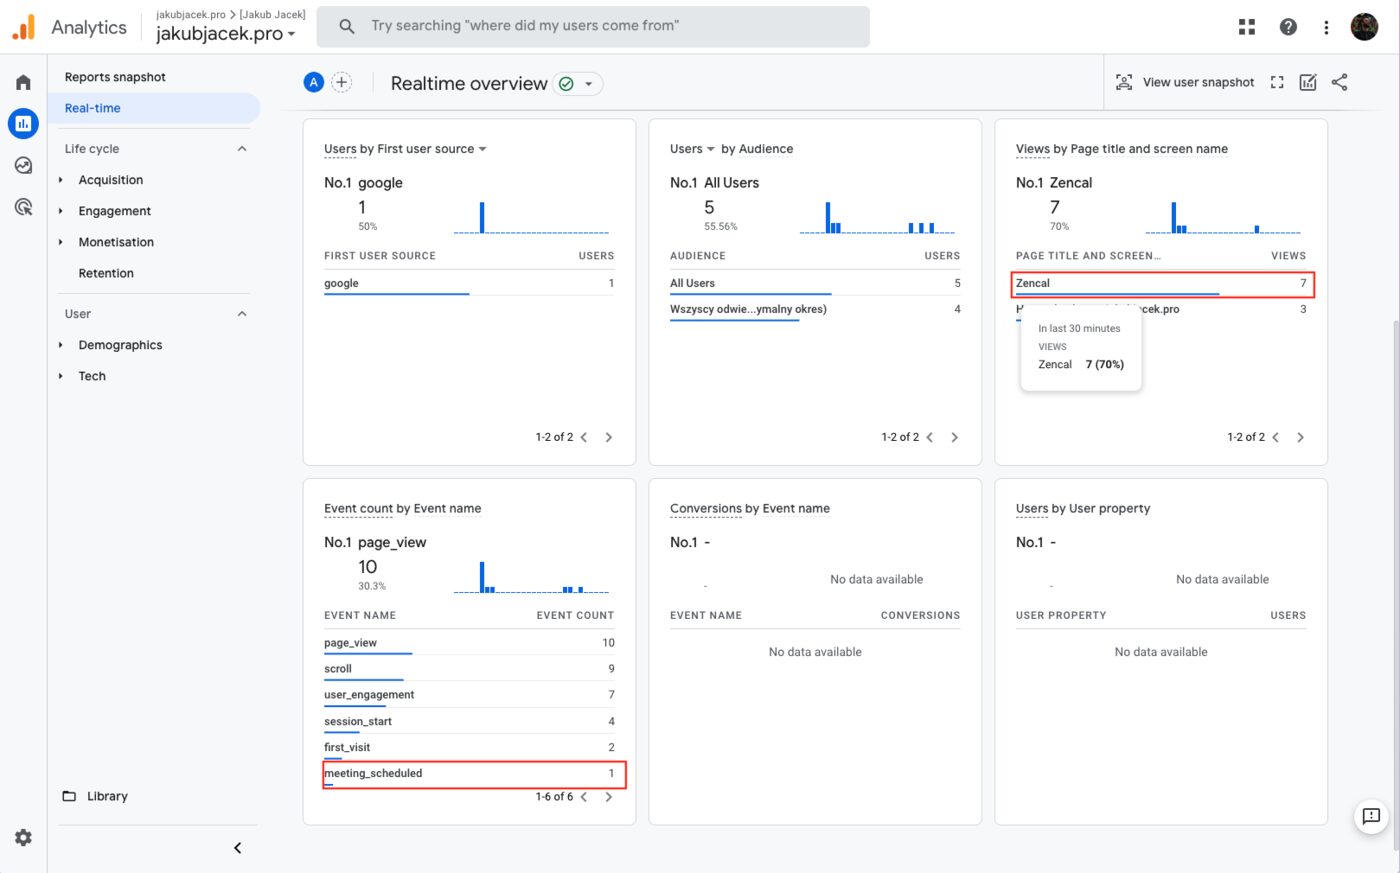
Method 2: Real-time Report
Test with a live appointment booking:
- Open Google Analytics and navigate to Reports → Real-Time
- In another tab, go to your Zencal profile and schedule a test appointment
- In the Real-Time report, verify that "Zencal" appears in the Page title section
- Check that the "meeting_scheduled" event appears in the events list
Start your 14-day free trial and automate your scheduling today.
Advanced Google Analytics Configuration
Take your tracking to the next level with these advanced configuration options.
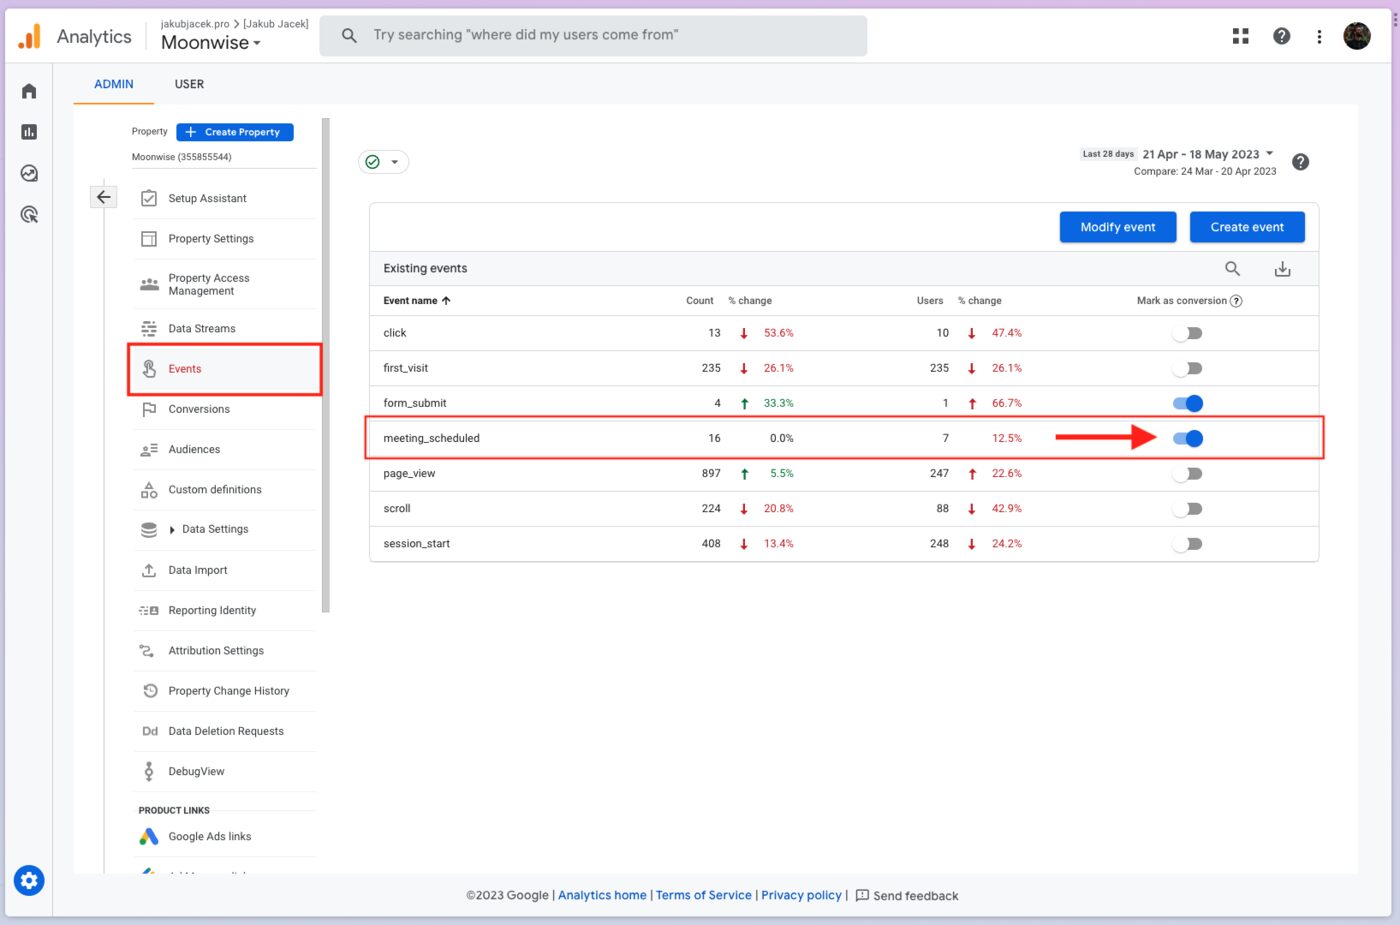
Mark as Conversion
You can designate appointment bookings as conversions in Google Analytics 4:
- Go to Admin → Events in Google Analytics
- Find the "meeting_scheduled" event
- Toggle the "Mark as conversion" switch
This allows you to track appointment bookings as primary conversion goals.
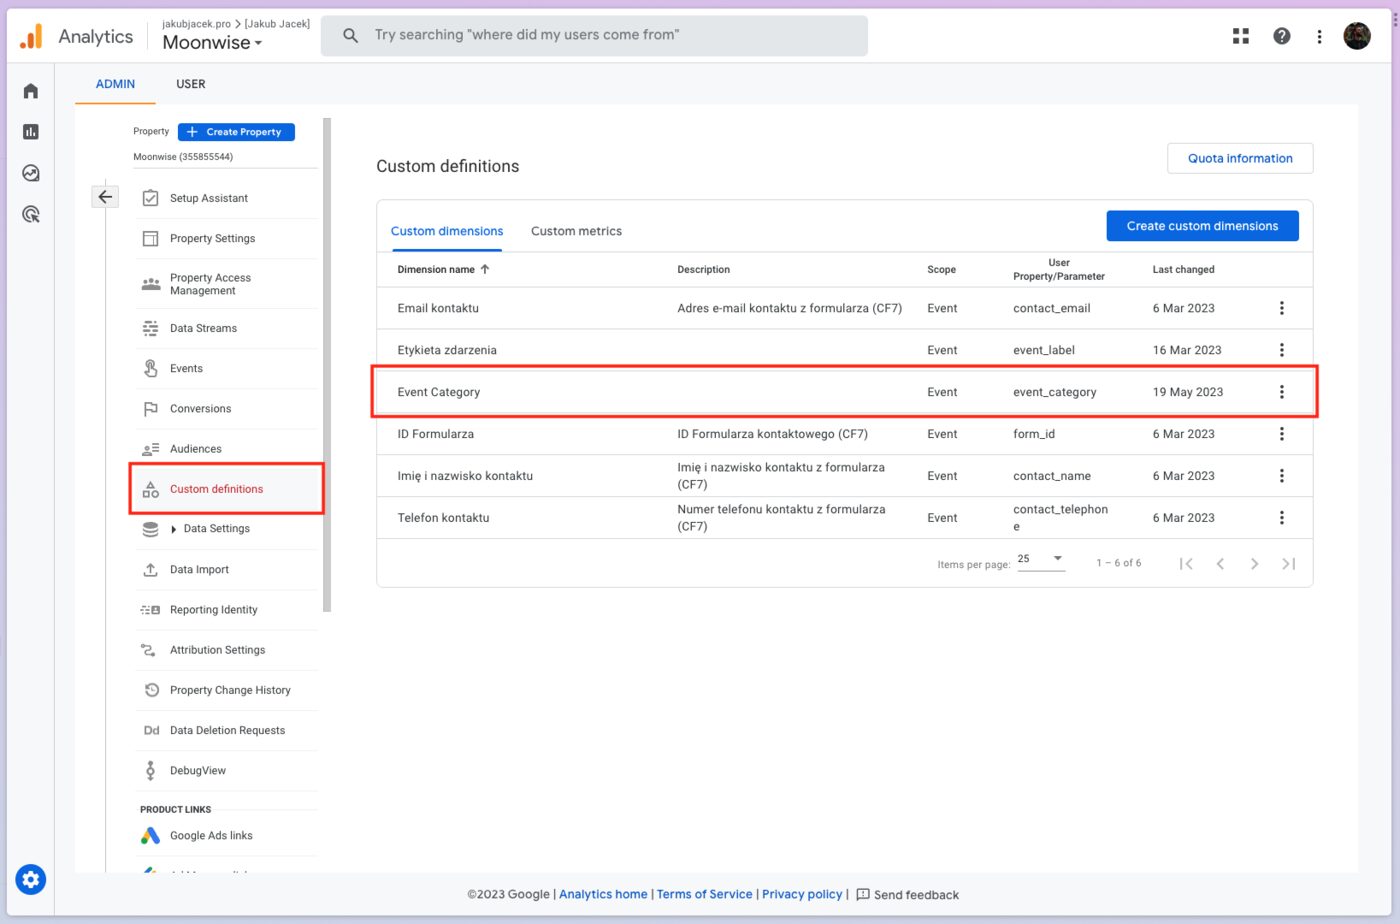
Custom Dimensions
Create custom event parameters for better filtering and reporting:
- Go to Admin → Custom Definitions
- Click "Create custom dimension"
- Name it "Event category"
- Set the scope to Event
- Map it to the "event_category" event parameter
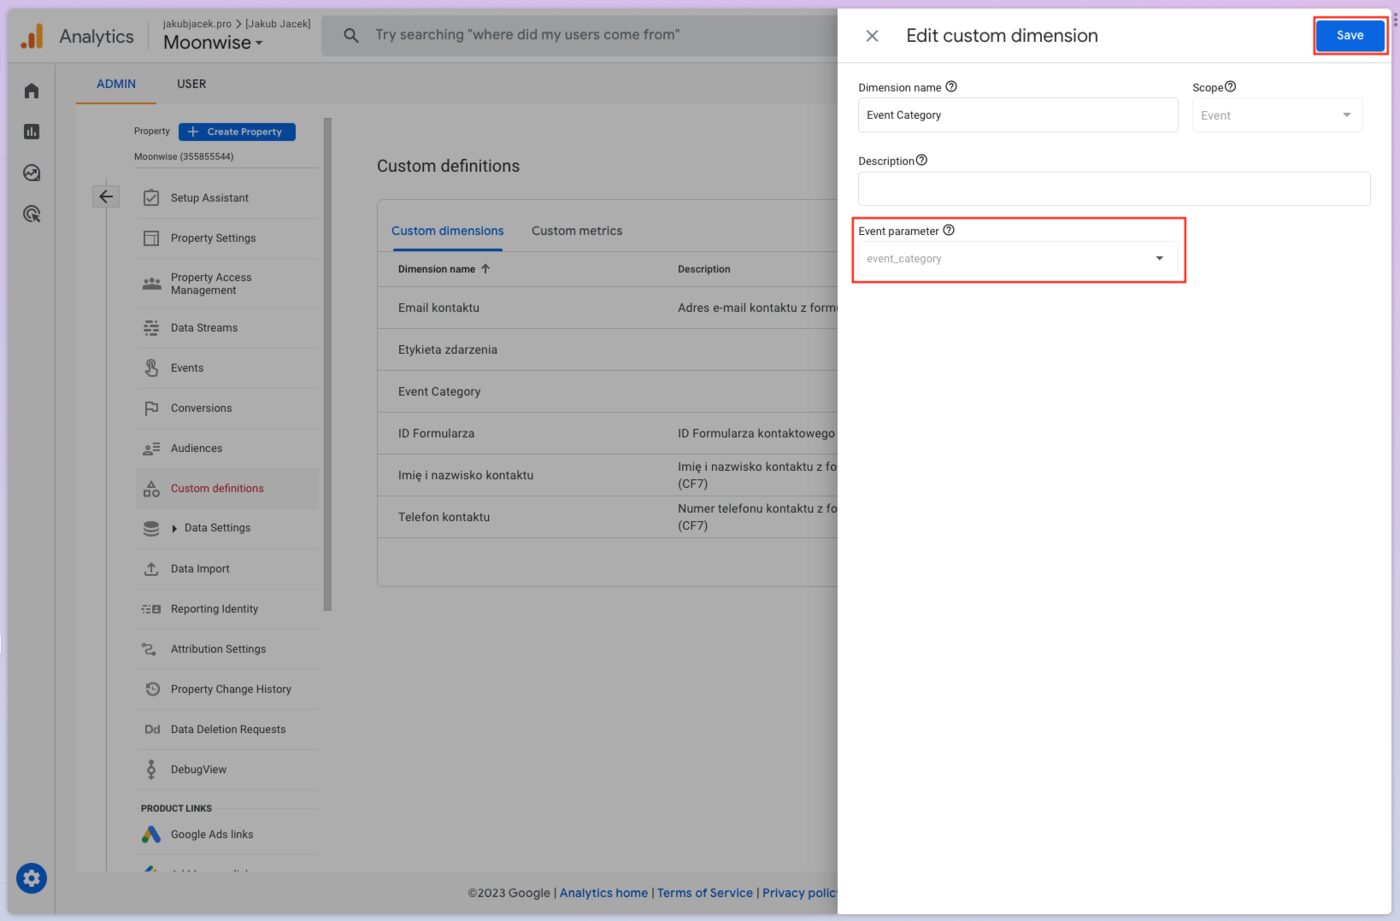
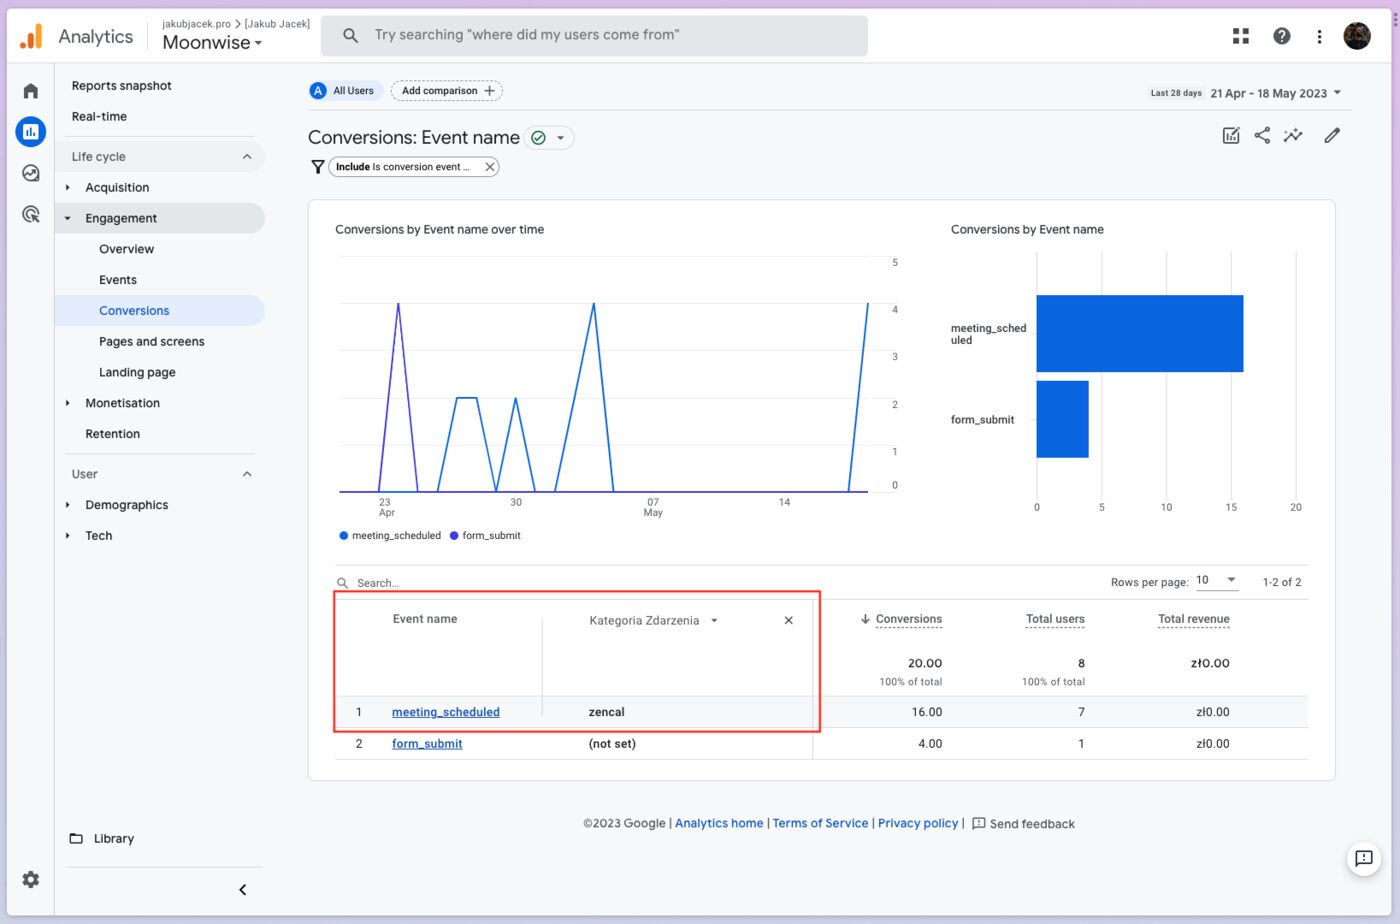
This allows you to filter your reports to show only Zencal-scheduled meetings by looking for "Event category: zencal".
Summary
Zencal practically takes care of all the analytics for you. Once you've configured your tracking IDs, the platform automatically sets up the necessary events:
- PageView - Fires when someone visits your booking page
- Contact - Fires when an appointment is confirmed (Meta Pixel)
- meeting_scheduled - Fires when an appointment is booked (Google Analytics)
With proper analytics in place, you can:
- Track the effectiveness of your marketing campaigns
- Understand user behavior on your booking page
- Optimize your conversion funnel
- Create retargeting audiences for future campaigns
If you have any questions about analytics implementation, feel free to reach out at contact@moonwise.pl.
Sign up for a free Zencal account to start tracking your appointment bookings today.
